The Best No-Churn Salted Caramel & Pecan Ice Cream
This no-churn ice cream recipe has a creamy vanilla base enhanced with salted caramel and pecans for crunch. If you love a cold, salty-sweet treat, this recipe is for you.
Best of all, it requires little equipment! It is an uncomplicated recipe, perfect for beating the summer heat. Try this homemade ice cream out for your next dinner party and wow everyone with your culinary skill!
What Does No-Churn Ice Cream Mean
Have you avoided making ice cream at home because you don’t have an ice cream maker and you can’t justify buying another piece of kitchen equipment you’ll only use on occasion? No-churn ice cream is the answer to all your problems.

No churn ice cream is ice cream made without an ice cream maker! All you need is a bread loaf pan or something of similar size for storing and a hand mixer or stand mixer to whip all the ingredients up! This method is so simple and quick (minus the freezing time) anyone can do it! Plus, its so fun to experiment with flavors and add-ins once you have your plain base made.
How To Make Salted Caramel No-Churn Ice Cream
Salted caramel ice cream is one of my favorite ice cream flavors. I adore the combination of salty and sweet! The added crunch of the pecans gives the texture I crave in ice cream. This recipe is highly customizable, feel free to add more or different nuts, or even chocolate chips or coffee beans!
Making The Salted Caramel
For this homemade salted caramel ice cream, start with making the sauce! First, add heavy cream to a small saucepan and set the heat to low. The goal is to slightly warm the cream because you don’t want to add a cold dairy product to hot liquid.
Then, over medium-high heat, add the sugar and water to a heavy-bottomed saucepan and stir to combine. Once combined, increase the heat and bring it to a boil.

Continue boiling until the mixture and bubbles on top turn a deep amber color. Please keep in mind that this is a very fast process, the mixture will turn from amber to burnt in a matter of seconds. Under no circumstances should you walk away from the pot (I learned this the hard way!).
Then, slowly whisk in the warmed cream until thoroughly incorporated. Remove from heat and add salt and butter. Stir until butter is totally incorporated into the mixture. Transfer to a serving dish or storage container and allow to cool while you prepare the ice cream.
Making The Ice Cream Base
While the salted caramel is cooling, begin making the base for your no-churn ice cream! First, pour the sweetened condensed milk into a bowl and add some vanilla extract. Again, you may substitute vanilla for another extract like lemon or almond, or add one in addition to the vanilla. I recommend adding it for a nice full, sweet flavor.
In a separate bowl, whip the heavy cream with a hand mixer or a stand mixer until still peaks form. After the peaks have formed, add one scoop of the whipped cream to the bowl of condensed milk and mix it in. I then use a silicone spatula to gently fold the rest of the whipped cream into the now lightened condensed milk. Thoroughly incorporate the whipped cream into the mixture, but do not overwork it to the point it loses its airiness.
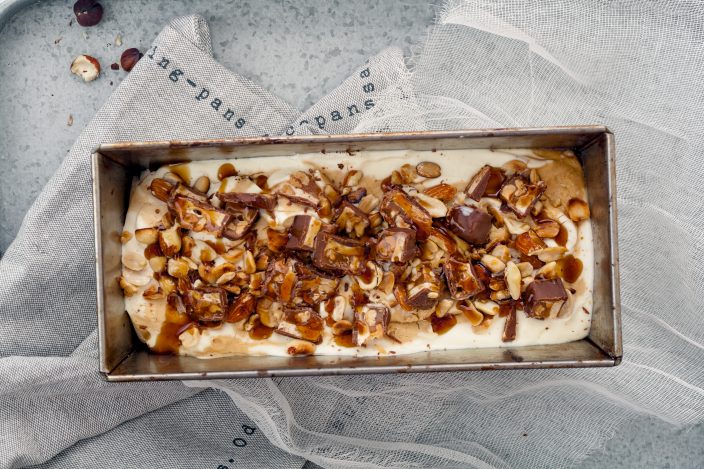
Pour half of the whipped cream/condensed milk mixture into an 8” loaf pan or a similar container. Drizzle the cooled salted caramel sauce over the milk mixture and spread the chopped pecans evenly over the entire surface. Top with remaining whipped cream/condensed milk.
Use a butter knife or spatula to incorporate the caramel sauce and pecans throughout the ice cream. I cut into the soft ice cream and made “cuts” back and worth to even distribute the caramel and nuts.
Cover the ice cream with parchment paper and press down to remove any air pockets. Place in freezer for a minimum of 6 hours, but preferably overnight.
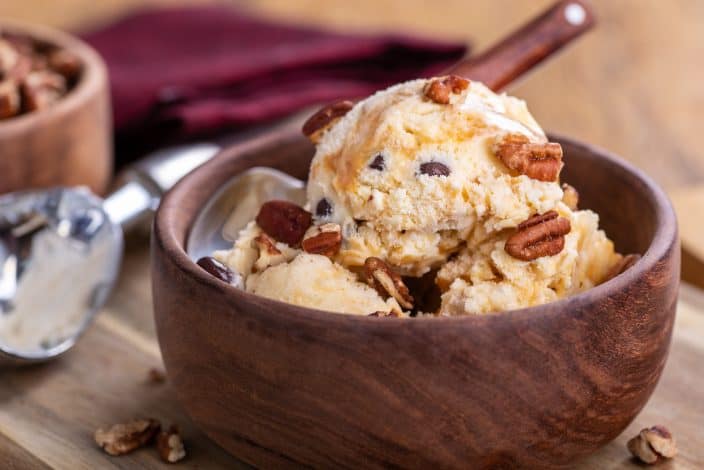
This homemade ice cream will last up to 2 weeks in the freezer. Before serving, drizzle more caramel sauce, chocolate sauce, and nuts over the top!
Tools You May Need To Make No-Churn Ice Cream
- Stand mixer or hand mixer. This is an essential kitchen item! It’s important to have one to whip the whipped cream into peaks!
- Silicone Spatula. I use this to fold the whipped cream into the sweetened condensed milk.
- Sauce Pan. This sauce pan is good for the high heat cooking of the caramel in this no-churn ice cream recipe.
- Bowl. I used a large stainless steel bowl to mix the base of the ice cream ingredients.
The Best No-Churn Salted Caramel & Pecan Ice Cream
Ingredients
Ice cream base:
- 1 14- oz. can sweetened condensed milk
- 2 cups cold heavy cream
- 1 t. vanilla extra [optional]
Salted Caramel Sauce:
- 1 cup white sugar
- 2 T. water
- ½ cup heavy cream
- 4 T. unsalted butter
- 1 t. fleur de sel salt
Optional:
- 4 oz. chopped pecans
Instructions
- To prepare the salted caramel sauce, add heavy cream to a small saucepan and set the heat to low. The goal is to slightly warm the cream because you don’t want to add a cold dairy product to hot liquid.
- Over medium-high heat, add the sugar and water to a heavy-bottomed saucepan and stir to combine. Stop stirring and bring to a boil.
- Continue boiling until the mixture turns a deep amber color, then slowly whisk in the warmed cream until thoroughly incorporated. Remove from heat and add salt and butter. Stir until butter is totally incorporated into the mixture. Transfer to a serving dish or storage container and allow to cool while you prepare the ice cream.
- For the ice cream, pour the sweetened condensed milk into a bowl and add the vanilla extract, if desired.
- Whip the heavy cream in a large bowl with a hand mixer or immersion blender until still peaks form.
- Add one scoop of the whipped cream to the bowl of condensed milk and mix it in. Then gently fold the rest of the whipped cream into the now lightened condensed milk. Thoroughly incorporate the whipped cream into the mixture, but do not overwork it to the point it loses its airiness.
- Pour half of the whipped cream/condensed milk mixture into an 8” loaf pan. Drizzle the cooled salted caramel sauce over the milk mixture and spread the chopped pecans evenly over the entire surface. Top with remaining whipped cream/condensed milk.
- Use a butter knife to incorporate the caramel sauce and pecans throughout the ice cream by pressing it down into the mixture and making sweeping “cuts” back and forth across the entire length of the pan.
- Cover with wax paper and press down to remove any air pockets. Place in freezer for a minimum of 6 hours, but preferably overnight. Will last up to 2 weeks in the freezer. Store any remaining salted caramel sauce in an airtight container for up to one week.
A Delicious Summer Treat
This homemade salted caramel ice cream really satisfies my craving for a salty-sweet treat. Just in time for the heat of summer, this dessert will cool you off and delight you at the same time. No need to go out and buy a tub of your favorite ice cream when you can make it at home! I love any chance I get to be creative in the kitchen and entertain others with tasty food, dessert, and drinks.
If you’re interested in more easy summer desserts, try our Homemade Peach Cobbler!
- 14 Best Things to Do in Wilmington, NC and Where to Stay
- 3 Romantic North Carolina Mountain Getaways
- Romantic Beach Getaways
- Easy Holiday Entertaining Ideas
- Wine and Cheese Pairing
Have you ever made homemade no-churn ice cream? Let us know in the comments below!


